Tuesday 31 January 2017

Depth and Line of Sight

How to Make Pictures - Depth 

What do we mean by depth in an image? - The illusion of distance or a third dimension. Depth can be created by scale, overlapping, line of sight, foreground, mid-ground and background.
Is depth only relevant to image makers who want to make realistic artwork? - Any artist should always consider depth as a tool of composition even when creating abstract images because not using depth when creating an image can make uninteresting to the viewer.
What is line of sight? - The direction in which the viewer's eye moves across the image. The artist should make sure one line leads to another and eventually to the key information. Line of sight is controlling how the viewer sees the image.
What does line of sight do for your composition? - It leads the unconsciously to a centre of interest. The artist my purposefully clash the line of sight to create a scene of conflict or violence.
How does the movement of relate to the line of sight? - It moves the eye more smoothly from one piece of information to another. 


Brief - Over There

  • Create an illustrated landscape from looking out of one of the windows in college.
  • Make a diorama from one of the rough observational drawings.


I chose a place that seemed of most interest when thinking about different compositional elements that can be included in an image. 
Usually, I dislike observational drawing but I feel like it was more to my interest when concentrating on composition rather than just looking at what is in front of you.
Some of the drawings are a lot stronger in terms of depth and line of sight than others. This could be because I have never considered these elements consciously before but now I am focusing on making the composition as strong as possible.
I personally like the drawing that is at the bottom of the first page as the foreground, mid-ground and background are clear. This would be strong when creating a diorama which could easily be made three dimensional.
Although, I think it may be quite dull to create a diorama with just buildings so I am going to use another one of my observational drawings for the final piece.

I am particularly proud of this piece because of the use of layers to create the diorama which at first I weren't sure which design to do. Although, I am glad I chose this design as I find creating the textures of the ground interesting.
The us of the window frame and the rain running down it seems to complete the piece as a whole as it completely alters the perspective of the piece.
When I thought I had finished the piece I felt unsure about the background/floor of the image as it seems to blend well with the orange tone of the edge of the window.


I managed to overcome this problem by adding separate layers of mud piles to the piece to create
further overlapping in the image which breaks up the background from the foreground.
If I were to complete this brief again I would most likely create more observational drawings from a different area of the college and possibly make the diorama three dimensional to add further depth and shadow to the image.

Monday 30 January 2017

3D Craft and Lens

Task

  • Imagine yourself as a mutant with a specific superpower/mutation
  • It can be something you like or dislike, a power you have always dreamed of having or just an idea that sounds fun or interesting
  • Produce a 3D illustration of the mutant using craft, human figure, object and photography
  • Think out the idea and draw it out before creating the final image 
  • Consider how prop, costume, object, puppet and location can all help generate the illusion
  • The camera quality and lighting will contribute to the idea

I'd love to be able to chill and sit on my cat's back all day whilst he walks around so why not make a mini version of myself relaxing with him?
This is the first time I have used my Posca pens making me a little bit nervous and unambitious when creating the final piece. 
I should have practiced using them more before in my sketchbook. 
Did I think about the composition of the image enough?
I think the composition of the photograph is well done as both me and Sox are on the line with the rule of thirds. However, I could have used a higher quality camera with better lighting as Sox is quite dark so you can't see him in as much detail.


Composition

How to Make Pictures - Introduction 

What is composition? - Composition is the selection and arrangement of appropriate elements in the picture so that the artist's idea can be shown effectively. It is combing forms and space to produce a strong piece.

What can good composition achieve? - It gives the viewer a sense of order and beauty.

What are the four main elements of composition? - Picture area, depth, line and value.

What is the first thing to do when thinking about composition? - It is best to simplify into basic shapes and arrange them to make them compositionally strong. The elements can be rescaled and positioned.

What is the difference between sketching and making art work? - Sketching is part of the thinking process meaning it is a lot more broad than the final art work. Art work is composing the final together.

My thoughts on Composition:

As a practising illustrator I would like to work on focusing more on the compositional elements of my work as it's important for the viewer to be able to read the image. Also I believe it is an essential skill for an illustrator to have because it can take your work up to the next level. 


Practical Task - 3 Elements Painting Challenge

  • Design 5 full bleed, compositional sketches of a figure, object and location
  • Use an A7 frame size to create roughs in your sketchbook
  • Landscape or portrait
  • Choose the best rough composition and create an A3 painting using ink and a brush

Figure: royal guard 
Object: cup of tea
Location: casino

The thought of having to create this compositional piece is worrying me because I've never drawn these three things before meaning I will have to practise drawing the different elements in my sketchbook which will take up more time. 


I used my sketchbook to create different rough composition ideas which I found useful before creating the final design. Thinking about compositional elements throughout each rough allowed me to think of the best possible why to create the strongest piece. 


Before creating my final piece of artwork I practised using ink in my book which I struggled with at first when I tried to shade the piece because the ink kept running. I have decided to change the composition of the piece completely. The new idea I am going to use has more of a humorous effect as well as being better compositionally. Should I add more colour to the piece or keep it simply as black ink with shading?


I am happy with the outcome of the final piece because I believe it is compositionally strong which was my aim. The shading has been espeically effective for the piece as it has given more depth to the image. The eye of the viewer is lead from the foreground to the background of the image in a 'Z' form which then circles back on itself because of the positioning of the royal guards helmet.
Would I have been able to achieve this using more variation of colour?
If I were to repeat this brief as a whole I would create more of a frame around the drawing rather than taking the ink to the edge of the paper as framing of the image is another strong compositional element.

Sunday 22 January 2017

End of Module Evaluation

End of Module Student Evaluation
BA(hons) Illustration
Module Code: Visual Skills OUIL405 Visual Narratives

Name:
Student ID:

Please identify where the evidence for each of the learning outcomes is within your submission and how well you feel you have met the learning outcomes. Please also grade yourself in relation to the learning outcomes using terms:
> poor, satisfactory, good, very good, excellent (Note- This is so that the team have an understanding of how well you feel you have done. It is not an indication of the actual grade you may receive)

Learning Outcome
Evidenced where?
Blog, Sketchbook, Roughs Final Illustrations, development sheets etc.  (No more than 75 words)
Your grade
Using words:
> poor, satisfactory, good, very good, excellent
4A6 
Demonstrate a range of approaches to research in the collection, development and communication of source material.

This can be seen through my sketchbooks for both One Week Map and Visual journalist where I used my sketchbook to create visual research as well as collecting information from people as well as secondary research which can be seen on my blog.
satisfactory
4B5
Explore individual responses to creative opportunities, source material and visual research appropriate to set briefs and identified problems.

This can be seen in my sketchbook where I have responded with different rough designs and experimenting with different mediums.
good
4C6
Select and investigate appropriate practical approaches to the investigation of visual development and communication of source material in response to a brief.

I have experimented with different mediums throughout my roughs on A3 pieces of paper and in my sketchbook work throughout research.

good
4C7
Explore appropriate processes and techniques in the visual development of ideas relating to narrative, sequence and content.

I have developed my processes by doing exhaustive drawings on A3 sheets as well as in my sketchbooks for initial research for both One Week Map and Visual Journalist.
Satisfactory
4D5
Demonstrate an effective use of appropriate methods of recording, documenting and evaluating individual progress.
I have used my blog and my sketchbook to create recordings using both visual and formal documentation. I have been critical of my work on my blog.
Satisfactory

Evaluation (See guidance below for more information)
You are required to write a 500 word evaluation of this module.

Overall I feel like I could have engaged further with the module as a whole as I found it difficult working in a group for the first brief especially when we had to navigate ourselves around Leeds. It seemed to take a while to work out what we would focus on to create the final screen print. I found it useful having a mixture of ideas that we could all settle on although I seem to be full of ideas and I understand screen printing well making it difficult for me to listen to other people’s ideas knowing that it would make the printing process more difficult. However, once we decided on what we were going to do the final result looked amazing with the use of minimalistic colours and overlapping text to create the theme of the bustling market.

The most useful part of the module for me was learning new techniques when screen printing. Also the InDesign sessions have helped me learn more about using the software which I was unable to use properly before. The Visual Journalist brief helped me develop my time management skills although I believe I could have used my time more effectively than what I did by starting my own field trip earlier and asking people who know the place more questions although it was quiet both the days I went because of the weather.

I began to spend more time in the studios to create my work such as the day of the assessment briefing which made me realise I need to create more roughs before I create the final book. I should have used the available time I had in the studio more to create work as I get more distracted at home. I didn’t have any momentum to create work at the start of the brief which I think is because of working in a group of people I didn’t know particularly well although I got over this and began to create more work at a faster pace. However, I have found myself caught up with blogging once again which wouldn’t have happened if I blogged a small amount each night rather than let it build up on me.

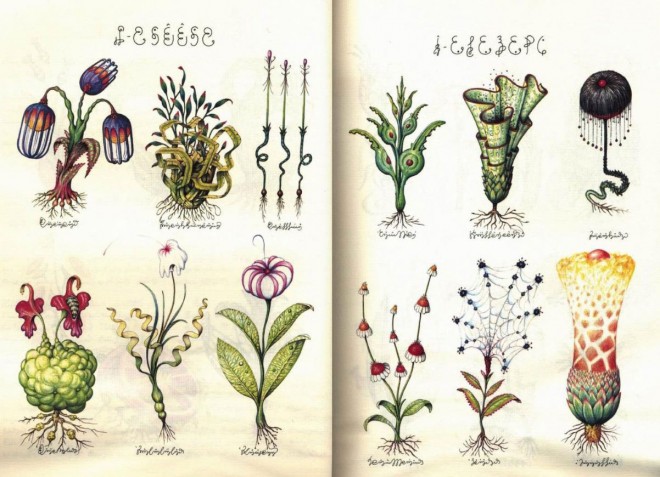
I have looked slightly into other artists work such as Stephanie Unger who inspired me to further develop my work without outlines and be more ambitious and unafraid of going straight into drawings with pen. Also codex seraphinianus helped me narrow my ideas down for my final picture book that was recommended to look into by a tutor.

I will use what I have learnt here in future modules by being more ambitious in my drawings using more experimental approaches and hopefully manage my time better by blogging a small amount more often so I don’t feel so worried about not finishing on time. I hope to spend more time in the studio at the end of the day so I can create work to my full potential.


Evaluation Guidance
This should be a reflective summary of your experience across the module, with a focus on SB2 & SB3

-       Overall, how well do you feel you have engaged with this module.

-       What learning took place? What was useful to you?
Be specific. New skills? New methods? New processes or approaches? Did you use the blog to reflect on your project development? Tell us about your research- how did you use it to inform the intent of your project?

-       What went well and why? What did you enjoy? What were you happy with as an outcome?
Be critical and analytical. Why did you enjoy it? Perhaps identify particular sessions?
This could be ideas, solutions to problems, studentship or research. How well did you use the studio? Did you invest enough time in the development and testing of your outcomes? Where did you invest the most energy? When did you feel positive and motivated?

-       What could you have done better?
What were the problems you faced? Did you get stuck or lose momentum? What did you do to overcome this? This could be in reference to studentship, organization, blogging or studio practice.

-       Contextual research.
How have you used the analysis of other artists, peers or other creative practitioners to inform your own approach? What are the principles, ideas and approaches you have identified as relevant to you?

-       How can you apply what you have learnt here for future modules and projects?
Application and future thinking. Things you would do differently next time? What useful methods, processes and ideas will you take forward into the next module?

You may also want to consider:

Self-questioning: How did your thoughts and opinions change as you progressed through the module?

Feedback: What other people (tutors and peers) thought of work and how you responded to that feedback?


Research: Did you use contextual research to inform your ideas, ways of thinking or understanding of the challenges set. This may include further research of your subject matter, slides from the presentations or use of the library.

Tell an Untold Story Part 2: The Picture Book

Storyboard


I came up with the idea of creating a children's book as awareness to how people are damaging nature but it always fights back and makes life out of what is broken. I created the storyboard unsure of the idea that I had because of the amount of text that would need to be involved in creating the work. 
I am still undecided on what materials I would like to use to create the final book making it even more difficult to manage my idea.
I liked the use of minimal colour in my storyboard which I would like to continue through into my final design as well as the tree on each page going horizontally across each page. 

Tutorial with Jamie

After showing Jamie my work up to date he gave me the idea of creating a typology style book full of the different creatures and plants/fungi that can be seen in the woodlands making life out of the dead trees. 
My current storyboard contains too much irrelevant text and I'd personally prefer to create more of a factual picture book.
Together we looked at codex seraphinianus which is an encyclopaedia of 300 pages with imaginary content such as plants and people. This work seemed more appealing to me as I enjoy creating character sheets without looking at images for reference.


This work inspired me to create exhaustive drawings of the same plants and creatures to the point where I didn't need to use a reference making it more unique with a slight hint of my own imagination. 


Drawing on larger sheets allowed me to develop my drawings further and experiment with altering each area of the object.
I am still unsure which medium to use for my final piece.
I want to make the drawings bright but which method is best to create this?
Using normal felt tips didn't work for colouring in the the designs because it left marks and it is unclear where the different patterns are on the creatures and plants.


POSCA pens saved my life.
I have recently started using these pens and weren't completely sure how well they would work until I discovered that you can overlap almost any colour with them. This allowed me to not have to use an outline to create the patterns. 
I took inspiration from Stephanie Unger who also uses POSCA pens to create a large amount of her work.
Would these pens work well when scanned onto Photoshop and Indesign?


I added the coloured background to the work to make the book look slightly more interesting to the reader.
However I wish I had created my own background rather than just a solid colour such as making my own textures or photoshopping my own photographs that I took of the woods. But I became too limited with time meaning I just kept it simple.
If I were to create the book again I would add a photographed background rather than a plain one to make it more interesting and personal to me. 

Indesign

I disliked using Indesign when I first started to add and alter the individual pages of my book. The pages were printing out at the wrong scale and I couldn't work out why. Although after a while I managed to print it properly ready to be stapled. I made measurements of where the tree would be placed across the page in the same place across the book.

This would have worked well with a concertina style book however again I began to struggle with time. 


Tell an Untold Story Part 1: The Visual Journalist

Trees

Being unexpectedly given 2 days to plan our own field trip meaning I had a short amount of time to think of the perfect place for my chosen theme. I went home to Sowerby Bridge where I know a lot of local woodland areas. 
I chose my favourite place to walk which is North Dean Woods which has several paths running through it.
Throughout the journey I took photographs and made quick sketches of different points of interest in the woods.


I also looked at secondary research online to look more into the factual information of the woodland such as the wildlife and plants that make it their habitat. 
After the 2 days of looking through my current research I have way too many possible ideas for my book design. 

I found it difficult to draw whist I were there because of the ground being wet I had to stand up making my drawings more wonky than what they usually are. At first I hated drawing trees but I made myself repeatedly draw the same trees over and over until I got the grasp of it. 


I began to enjoy drawing trees although it was still proving difficult whilst I were stood up in the pouring rain. I tried to do mark making of the textures on the different kinds of trees in the woods although they didn't turn out as well as I had hoped.


It could be because of the pencil I used to create the marks whereas it would have been better to use a softer tool such as crayon. However, I am thankful for the rain because it made the first mark making piece slightly clearer as it smudged the pencil. 


Peer Crit 

Taking part in a group crit with other people has helped me narrow down my possible ideas that I can focus on when I go back to North Dean Woods. Looking through my current research and sketches with fellow peers helped me to narrow down all my possibilities to one strong idea. I have decided to focus on the dead trees in the woods as there are a lot.

My secondary research has allowed me to get a closer insight on what animals and plants live there.


Further developing my research by looking into the wildlife that lives in the woodlands has allowed me to go back to the woods and look closer at the dead trees. After looking at them I have decided to look into the life that still lives from dead trees such as certain fungi and critters.